How To Switch on Velindre Keep Me Safe App Notifications
How to Switch on Velindre Keep Me Safe App Notifications
There are two ways to enable Keep Me Safe checklist notifications on your iPhone
- When you first download the app, select ‘yes’ to receiving push notifications
- Edit the notification settings on your iPhone
To edit the settings, first locate the settings app on your iPhone. The settings app will look like a silver cog. It can be found in multiple places.
-
On the bottom quick links bar

-
On the general home page area of your phone

-
The settings app can also be found in your iPhone search bar. Simply have the home screen open and swipe your finger down the screen, starting from near the top

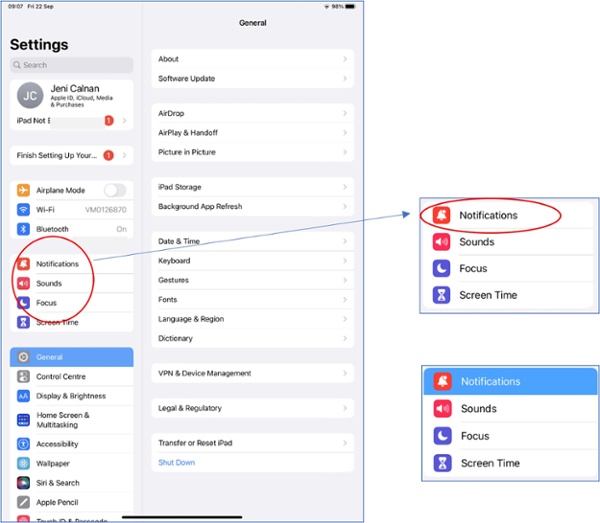
Once open you will need to click on the ‘Notifications’ section.

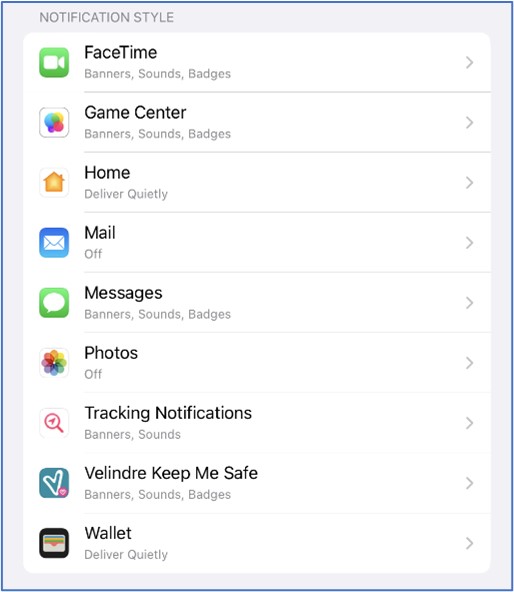
A list of all the apps on your iPhone will appear. From this list select the ‘Velindre Keep Me Safe’ App.

This means you can now edit the notification options specifically for this app. Any changes you make will not affect any other apps you have downloaded on your iPhone.
If you didn’t ‘allow the app to send you notifications’ when you first downloaded Keep Me Safe, your notification settings for this app will look like this.

Press the toggle button once and it will slide to green. Green symbolises that basic notifications are now turned on.
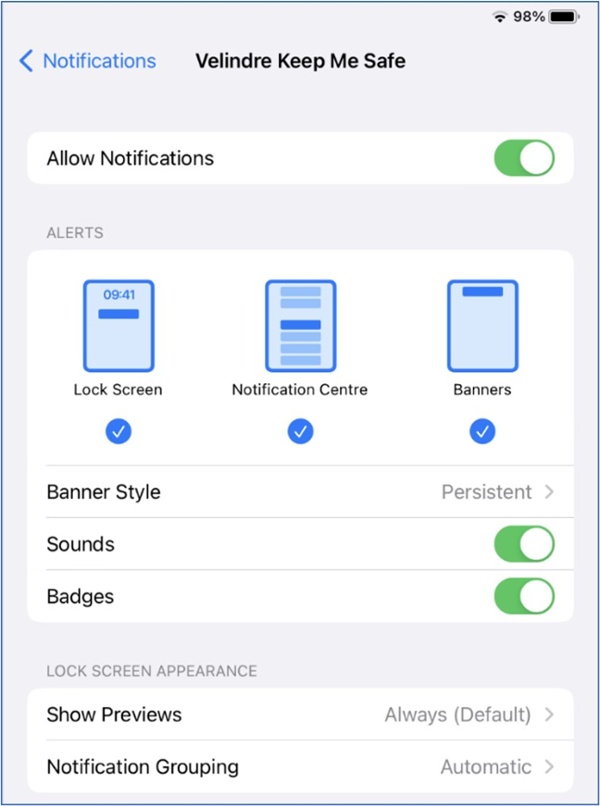
The basic notifications are now switched on. However, you need to ensure all the ‘Alerts’ options are ticked so you receive a notification when the Keep Me Safe checklist is available.
To do this make sure that the sounds and badges options are also green.

Make sure all these options are enabled to give you the best possible opportunity to see the checklist notification.
Banner style: Persistent, means you will see the notification until you dismiss it, in case you are not present when the notification first appears on your phone.
Make sure sounds and badges are clicked so they swipe to green.
Show previews in the lock screen: Always (Default).
The changes will save automatically, and you will receive checklist notifications on your lock screen next time your checklist window is open.